Spring Boot - Hello World
Tools used
- Maven 3.5.2
- Java 8
- [start.spring.io](https://start.spring.io/)
- Eclipse Java EE IDE for Web Developers
Description
In this sample, we will create a spring boot application that will return Hello World when we go to the endpoint /hello.
Generating POM.xml
Go to start.spring.io
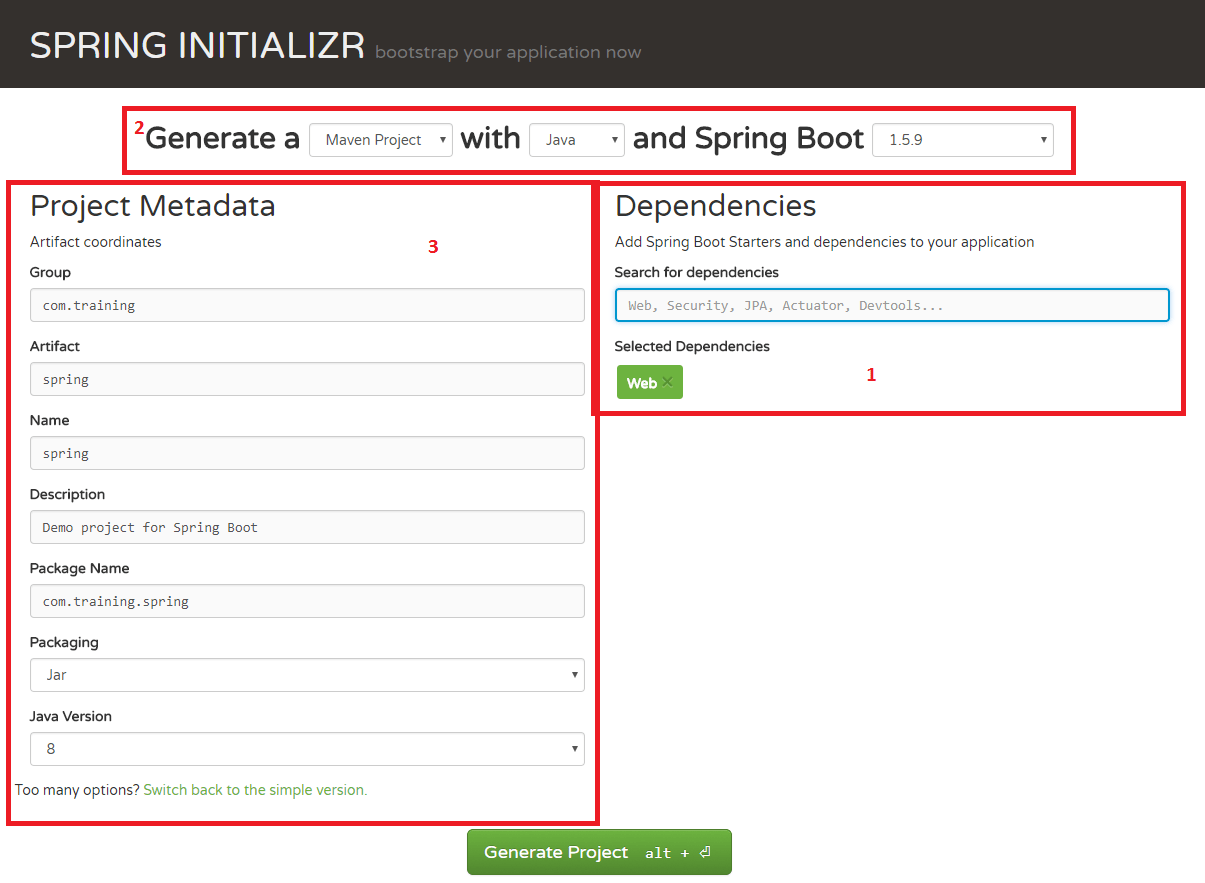
The first part is project dependencies. We can specify components that we want to use in our project here. For example, if we want to create a web project, we can specify the project dependencies here, and click generate project.
The second part is project type, we can choose maven / gradle project, language used (for now, spring support
Kotlin,GroovyandJava).In the third part, we can specify the package name and project packaging (can be
warorjar). If we choose war, we will need to deploy it on server (for example tomcat for web project).
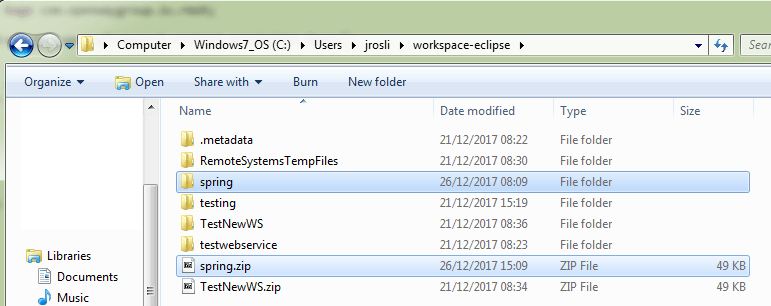
Download and extract the project. (My project named spring.zip)
POM.xml
Since we are generating maven project, Inside the generated project, there will be a file named POM.xml. The spring initializr will configure the project dependencies inside POM.xml and prepare the project structures for us.
<?xml version="1.0" encoding="UTF-8"?>
<project xmlns="http://maven.apache.org/POM/4.0.0" xmlns:xsi="http://www.w3.org/2001/XMLSchema-instance"
    xsi:schemaLocation="http://maven.apache.org/POM/4.0.0 http://maven.apache.org/xsd/maven-4.0.0.xsd">
    <modelVersion>4.0.0</modelVersion>
    <groupId>com.training</groupId>
    <artifactId>spring</artifactId>
    <version>0.0.1-SNAPSHOT</version>
    <packaging>jar</packaging>
    <name>spring</name>
    <description>Demo project for Spring Boot</description>
    <parent>
        <groupId>org.springframework.boot</groupId>
        <artifactId>spring-boot-starter-parent</artifactId>
        <version>1.5.9.RELEASE</version>
        <relativePath/>
    </parent>
    <properties>
        <project.build.sourceEncoding>UTF-8</project.build.sourceEncoding>
        <project.reporting.outputEncoding>UTF-8</project.reporting.outputEncoding>
        <java.version>1.8</java.version>
    </properties>
    <dependencies>
        <dependency>
            <groupId>org.springframework.boot</groupId>
            <artifactId>spring-boot-starter-web</artifactId>
        </dependency>
        <dependency>
            <groupId>org.springframework.boot</groupId>
            <artifactId>spring-boot-starter-test</artifactId>
            <scope>test</scope>
        </dependency>
    </dependencies>
    <build>
        <plugins>
            <plugin>
                <groupId>org.springframework.boot</groupId>
                <artifactId>spring-boot-maven-plugin</artifactId>
            </plugin>
        </plugins>
    </build>
</project>
Downloading Maven Dependencies
- Navigate to the folder and execute:
mvn install
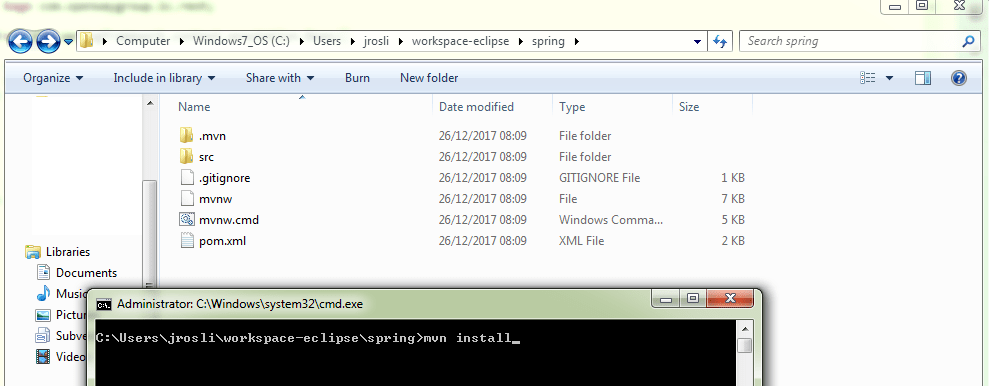
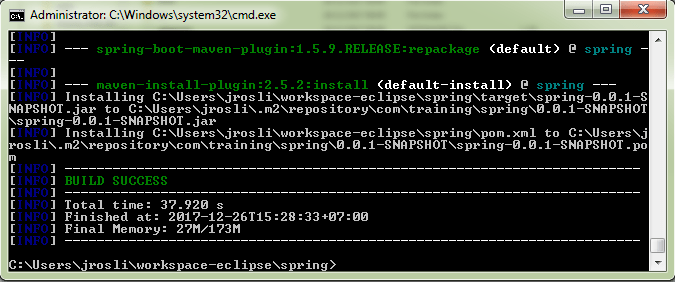
Some IDE like eclipse or Intellij idea have functionality to automatically sync and download maven dependencies, but basically they are executing the command.
Importing Project to Eclipse / other IDE
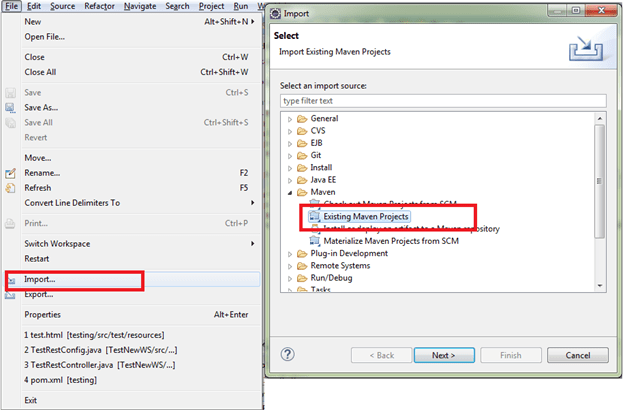
- Choose File > Import > Existing Maven Projects
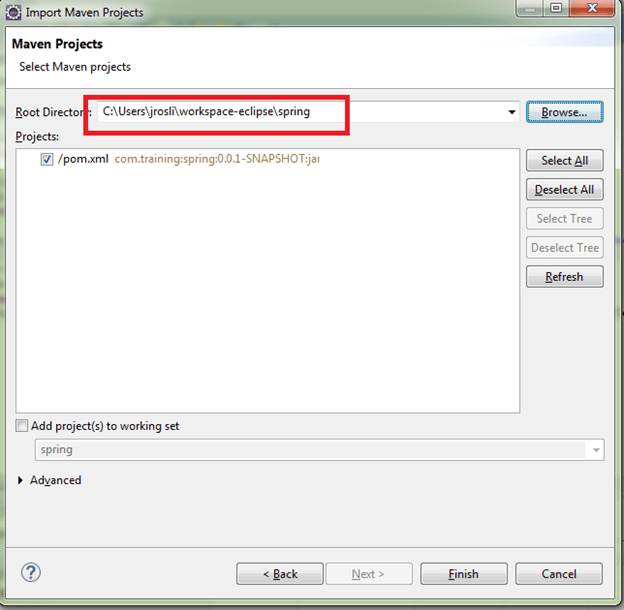
- Browse to the project folder and click finish.
Basic Project Structure
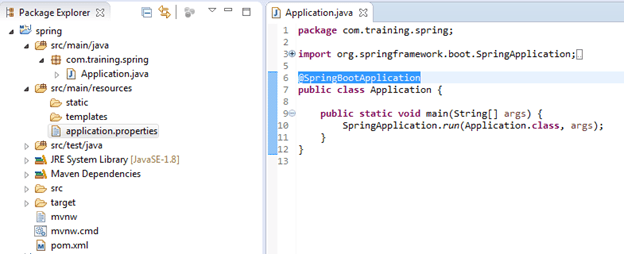
- The main class is annotated with
@SpringBootApplication. @SpringBootApplicationis a shortcut for 3 annotations:@Configuration,@EnableAutoConfiguration,@ComponentScan- The
@ComponentScanannotation by default will scan all class (in the same package) annotated with@ComponentScan. More info - In short, we will need to create the class function inside the the same package (or deeper) with the main class.
Creating a RestController
- Create a new package and class
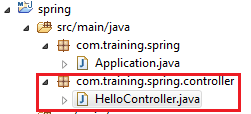
package com.training.spring.controller;
import org.springframework.web.bind.annotation.RequestMapping;
import org.springframework.web.bind.annotation.RestController;

@RestController
public class HelloController {

	@RequestMapping("/hello")
	public String Hello(){
		return "Hello World!";
	}
}
First, we annotate the class to be a
@RestController. This class will be a controller that will return aResponseBody. If we trace back, it is coming from@Controller, and@Controlleris a@Component. So this class will be initialized when the application starts.Next, we map the endpoint with the function that will handle it. We will use
@RequestMapping(“/hello”)which is a shortcut for@RequestMapping(path=”/hello”). This means, when we access to the end point (/hello) it will execute this function. When we didn’t specify HTTPMethods for this annotation, it means we can use any HTTP method to access it. We can use (HTTPGET,POST,PUT, ….etc)If we return String, it will return the string to the response body. But if we return an object, it will return json representation of the object. (automatically converted).
Running the application
There are several ways to run the application:
a. Running SpringBoot application using Eclipse
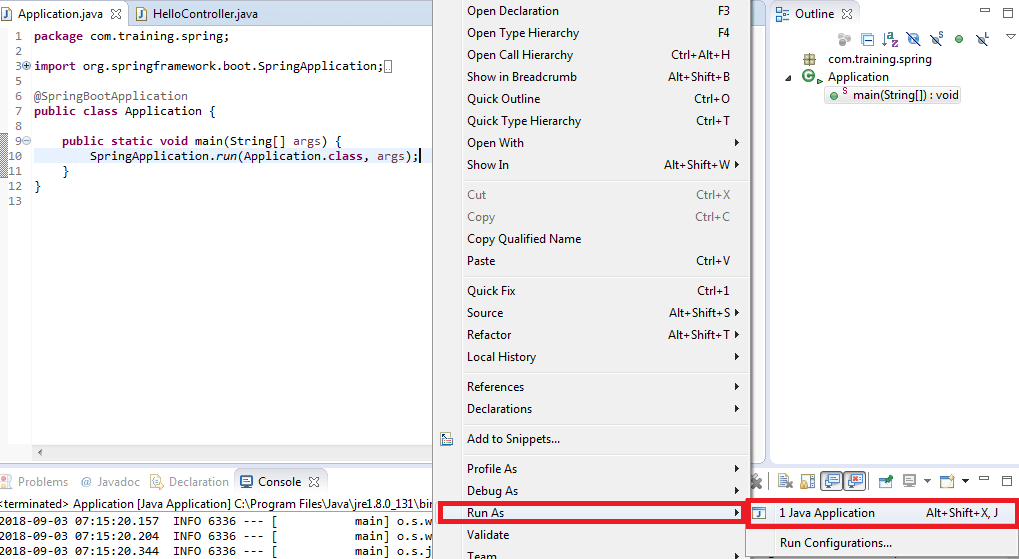
b. Running SpringBoot application using Maven
- To run the application, navigate to the project folder and execute:
mvn spring-boot:run

Test the application
- By default, spring application will open port 8080
- Open http://localhost:8080/hello

Other hello world sample: https://spring.io/guides/gs/rest-service/
